Creating a Watercolor Background by Jessica Joana Winter

Posted on
This post has been written by the extraordinarily talented Jessica Joana Winter
a member of the Stampin’ Up! 2018 Artisan Design Team.
Hello friends! Today I made a card for you with a watercolor background.
I created my card using the Petal Palette Stamp Set (item 145788) and I’m going to show you how easily you can turn a simple stamped image into a watercolor image.
1. Stamp the image as usual on a sheet of Watercolor Paper (item 122959).
2. Trace the stamped impression using an Aqua Painter (item 103954) filled with water. (It’s okay if the water is clearly visible.)
3. Pick up some ink from a Calypso Coral Classic Stampin’ Pad (item 147101) and lightly dab on the water.
4. Let it dry thoroughly and then you have your stamped image with a watercolor look.
I used this background to make a romantic card, for example for a wedding. I stamped the bird in Tuxedo Black Memento ink (item 132708) on Whisper White Cardstock (item 100730) and then cut it out using the Big Shot (item 143263) and the Petals & More Thinlits Dies (item 145655).
I stamped the greeting “Glückwunsch” (“Congratulations”) in Old Olive ink (item 147090) and cut it out using a coordinating Framelit. These amazing Thinlits also include some beautiful detailed images that I cut from Calypso Coral (item 122925) and Pear Pizzazz Cardstock (item 131201).
Finally, I decorated my card with Linen Thread (item 104199), True Gentleman Buttons (item 145596), Very Vanilla 1/2″ Lace Trim (item 141672), and Share What You Love Artisan Pearls (item 146927).
Jessica Joana Winter 2018 Artisan Design Team

SaveSave

Oh, and have yourself an... Inkee Fiddling Day!

Joanne x


Apron of Love!

Posted on

This is another of those stamp sets that it wasn’t until I saw what others were doing that I finally decided that I really needed to add both the Apron of Love Stamp Set and it’s matching Apron Builder Framelits Dies to my stash. And I’m so glad I did!

This stamp set contains a whopping 24 photopolymer stamps that covers everyone – mom, dad and your friend, along with an array of love’s for every occasion – baking, bbq and even stamping!

This set was originally offered in the Occasions Catalog but can now be found in the new 2018-2019 Annual Catalog on page 61 with the thinlets on page 215.

SaveSave

SaveSave

Oh, and have yourself an... Inkee Fiddling Day!

Joanne x


Lift Me Up!

Posted on

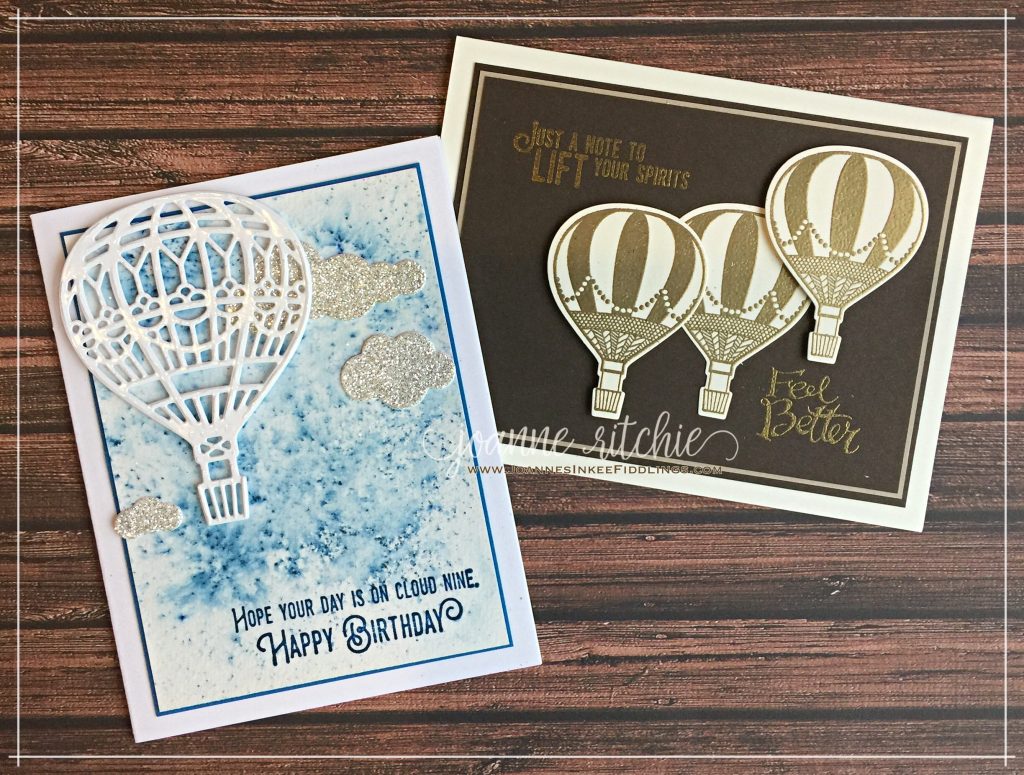
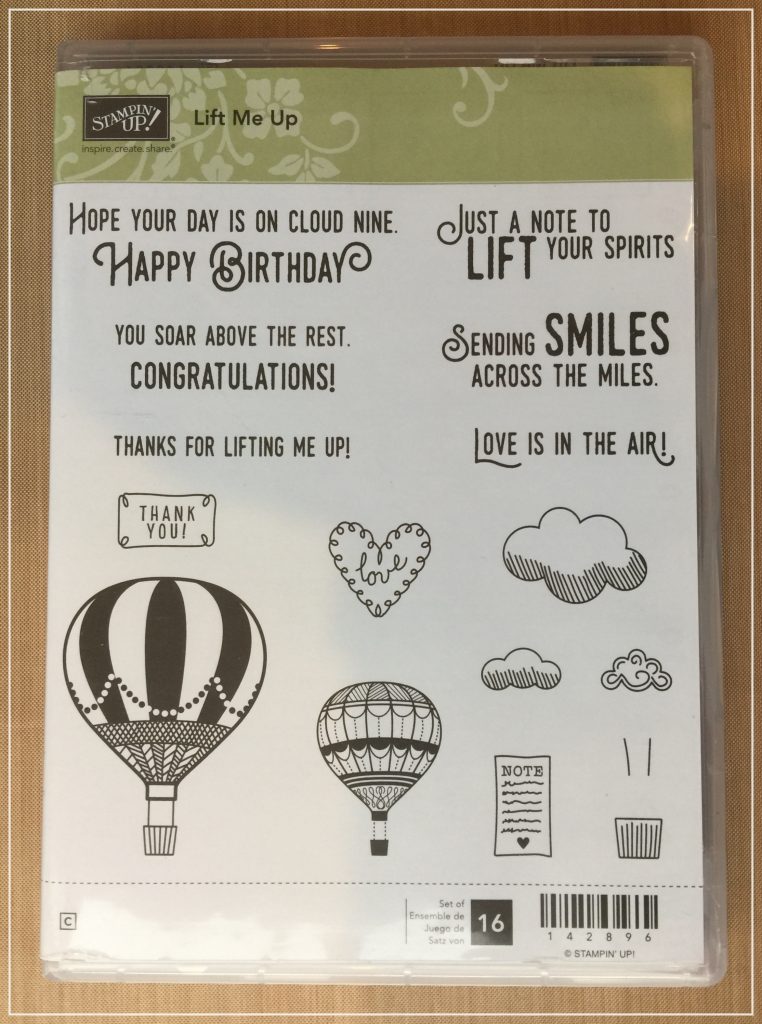
After seeing so many wonderful cards made with this set, I just had to add the Lift Me Up Stamp Set to my stash last year. Thankfully it’s in the new catalog as time flies when you um and ah!😂

This stamp set can be found on page 34 of the Annual Catalog. It contains 16 fabulously assorted stamps that will cover a variety of occasions with matching thinlets on page 221.

And doesn’t if team beautifully with the Prussian Blue Brusho?

SaveSaveSaveSaveSaveSave

SaveSave

SaveSave

Oh, and have yourself an... Inkee Fiddling Day!

Joanne x


Abstract Impressions Bundle

Posted on

Truly, you have to see this amazing new bundle of stamp set and thinlets, Abstract Impressions, in action to really appreciate it.

This bundle can can be found on page 129 of the 2018-2019 Annual Catalog and yep, is now at the top of my Wish List!

Oh, and have yourself an... Inkee Fiddling Day!

Joanne x


Shadow Stamping with the Stamparatus… by Jennifer Frost

Posted on
This post has been written by the very talented Jennifer Frost
a member of the Stampin’ Up! 2018 Artisan Design Team!
Once-tricky stamping techniques are now a breeze with the brand new Stamparatus (item 146276), available in the new 2018–2019 annual catalog as of June 1! Take shadow stamping, for instance. Adding subtle, professional-looking shadowing to the bold “Sorry” in these projects was quick and easy with this new tool!
How did I do it? To start, I positioned a piece of cardstock to the top left of my Stamparatus and secured it with a magnet. Then I placed my stamp from the Sorry for Everything Stamp Set (item 143820) face down on the paper and closed the plate to pick up the stamp. I lifted the plate, added ink (tone on tone, the same color as the cardstock), and reclosed to stamp the word. Then I allowed the ink to dry.
TIP: I used my heat tool to ensure this first stamped layer was dry; this will be important afterward in achieving a clean, heat-embossed layer.
Next, I positioned the paper exactly where it was again, bringing it down from the top of the Stamparatus edge just a tiny bit, a few millimeters, as pictured.
Then I applied VersaMark ink (item 102283) to the stamp and closed the plate to re-stamp the word. I added White Stampin’ Emboss Powder (item 109132) and heat set with the Heat Tool (item 129053) to complete the technique.
One of the key benefits of the Stamparatus is you can stamp multiples of the same project quickly and precisely. While the stamp was all set up and ready to go, I couldn’t resist creating a full collection of these lovely shadowed sentiments.
I’ve paired these stamped panels with the Share What You Love Specialty Designer Series Papers (item 146926). Bows of Linen Thread (item 104199) added a little texture and I’ve layered in touches of shimmer by way of Pearlized Doilies (item 146936), strips of Gold (item 146958) or Silver (item 146960) Glimmer Paper, and swashes of Berry Burst (item 145489) or Gold Metallic-Edge Ribbon (item 144146).
I hope you’ve enjoyed this set of cards and it encourages you to break out your Stamparatus and give a little shadow stamping of your own a try!
Jennifer Frost 2018 Artisan Design Team

SaveSave

SaveSave

SaveSave

SaveSave

Oh, and have yourself an... Inkee Fiddling Day!

Joanne x

Related Posts with Thumbnails